Has something about your shower pan seemed off recently? Perhaps it wobbles a bit when you step onto it, or your excess shower water isn’t reaching your drain. Spray foam may fix these issues.
Spray foam is a reliable tool to help prevent your shower pan from flexing and ensure proper leveling. A flexing shower pan may not be as much of a problem as you expect, but in dire scenarios, spray foam is an excellent solution.
How do you apply spray foam under your shower? When is it a bad idea to do so? Is there a variety of spray foam that works best? What alternatives to spray foam do you have?
Read on to learn everything you need to know about leveling your shower pan with spray foam.
Why Would You Use Spray Foam Under Your Shower Pan?
The main purpose of applying spray foam under a shower pan is to prevent or reduce the level of flex or motion when taking a shower.
In a worst-case scenario, flexing or wobbling can indicate a poor installation or a malfunctioning shower pan. The proper application of spray foam can help balance your shower pan to help you shower with peace of mind.
Additionally, if your shower pan is incorrectly leveled, or regularly flexes out of place, water may not move toward the drain and stagnate in your shower pan.
Using spray foam under your shower pan can help ensure proper leveling in your shower and correct any minor drainage issues.
However, shower pan support is not the original intended use of spray foam. Originally, this product was an insulator, so you must ask yourself; is this the right time for me to do this task?
When NOT To Do This?
Ultimately, if your shower pan is a thick-walled piece, you may not need to use spray foam at all. Most shower pans can resist high amounts of weight with very little issue, as it is exactly what manufacturers designed them for.
If you have an acrylic or plastic shower pan, especially with thin walls, you may experience more flexing than a sturdier granite shower pan.
In these cases, you may want to apply spray foam to your shower pan solely to make yourself feel more comfortable.
It’s also important to note the difference between a shower pan and a shower insert. Shower pans are typically thicker-walled than shower inserts and may show less flex.
What Spray Foam To Use?
When applying spray foam under a shower pan, you want a foam with minimal expansion.
As the foam expands, it will exert extra pressure against its surroundings, especially those fixed in place, including your shower pan.
If you use a spray foam that expands too much, you could face a cracked or bent shower pan, which is an entirely different issue than the one you were trying to initially fix.
Try to find a spray foam type specifically formulated for small spaces, such as windows and doors. These spray foams will expand less aggressively than others and are a great choice for shower pans.
How to Properly Apply Spray Foam Under Shower Pan
What Tools Should I Have?
Ultimately, the tools you need for this job will be similar to the ones you need for most other home improvement jobs.
Aside from the spray foam, they may even be tools that you have lying around the house. Here are the tools you will need in this scenario:
- Your spray foam of choice
- A ruler
- A level
- A lever
- An electric drill and/or screwdriver
- Corrosion-resistant screws
- A marker
- Glue
1. Prerequisites
Before getting to work, you must use a lever to remove your shower pan from its current position.
Depending on the size of your shower pan, you may need two levers for this action. In this case, we will talk about a traditional one-piece shower pan- typically, these will feature a fiberglass composition.
You may encounter roofing tacks, screws, or other fastening materials holding your shower pan in place and must remove those.
If your shower pan features any rubber membrane, cement, or tiles, they may break under the pressure of prying.
Pay special attention to your shower pan’s tailpiece, and use a second lever to move it if it is particularly sturdy.
2. Mark Positions
Using your marker, measure the position of the shower pan- you don’t want any spray foam going outside of the markings.
Measure both horizontally and vertically to know exactly how much spray foam you need to use. Remember to mark the location of any drains or obstructions.
3. Spray Foam
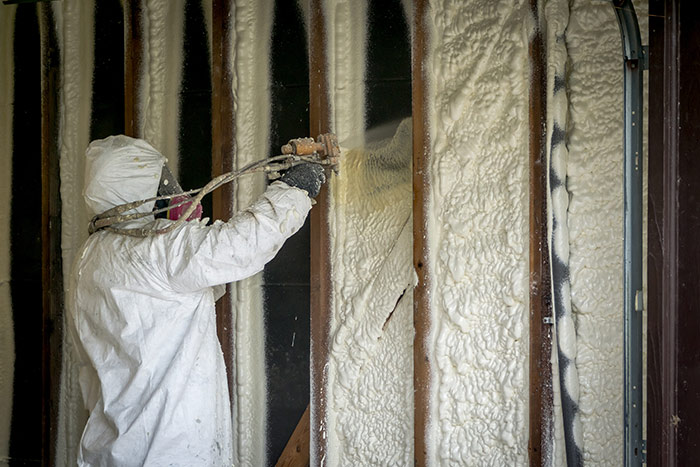
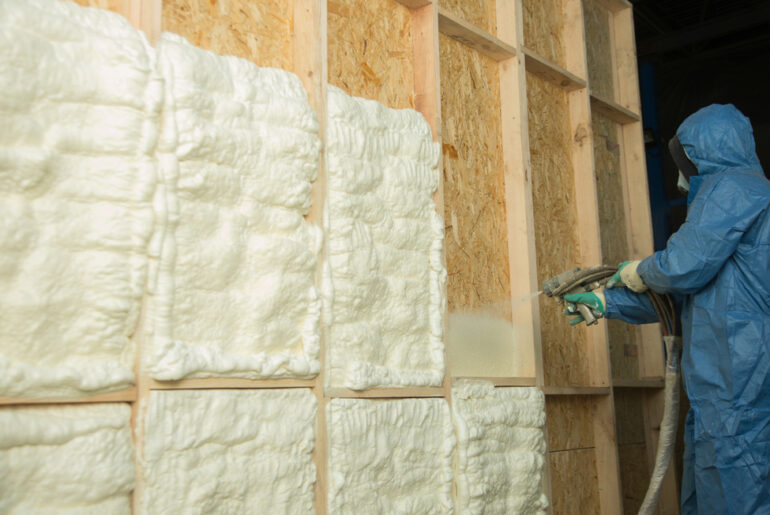
Now, you can install the spray foam. Spray within your markings for a quick and easy re-installation.
Be cautious about overfilling until you know how much your foam expands. In these cases, it’s better to use too little than to use too much, spray foam is far easier to install than it is to remove.
4. Install Shower Base And Check Level
Re-install your shower pan and use your level to ensure proper positioning. As the space under the shower pan is now occupied by spray foam, you may need to use more effort than before.
You should push the shower pan into place while the foam is still wet to reduce any resistance and help the foam conform to its shape.
5. Secure And Weigh Down
Screw your shower base back in place, or fasten it with any other fastener you require, and add some weight on top of it, or a temporary stop to prevent it from rising above a certain point. You can attach this stop to a wall to prevent a rising shower pan from moving it.
This weight ensures that it will slightly push back against the foam beneath it, maintaining its shape. Allow your spray foam to dry for 24 hours before showering.
Alternatives To Spray Foam
Spray foam may be an effective tool for many situations, but you must remember that it is an insulator first and foremost- it was not designed for this usage.
You might not trust spray foam to complete this job to your satisfaction and may want some alternate solutions.
The two main alternatives to spray foam for use under a shower pan are wood shims and grout, with wood shims being arguably just as popular as spray foam.
Wood Shims
When it comes to solutions hidden under spaces such as your shower pan, you don’t need them to be pretty, just effective, like wooden shims.
Using a series of wooden shims can help prop up your shower pan to the proper level, preventing flexing and pools of stagnant water.
When using wooden shims, you must ensure that the wood features a thorough water-resistant treatment.
Otherwise, a leak or high humidity levels can rot through your wood and leave you back at square one, with the added issues of mold growth.
Grout Pump
Grout is often the choice that professionals will make when dealing with flexing shower pans.
Using a manual pump, an installer will put grout under your shower to form a hard and sturdy base. Professionals and tradesmen refer to this process as mudjacking.
This method is more thorough than both spray foam and treated wood shims, but requires far more manual labor.


