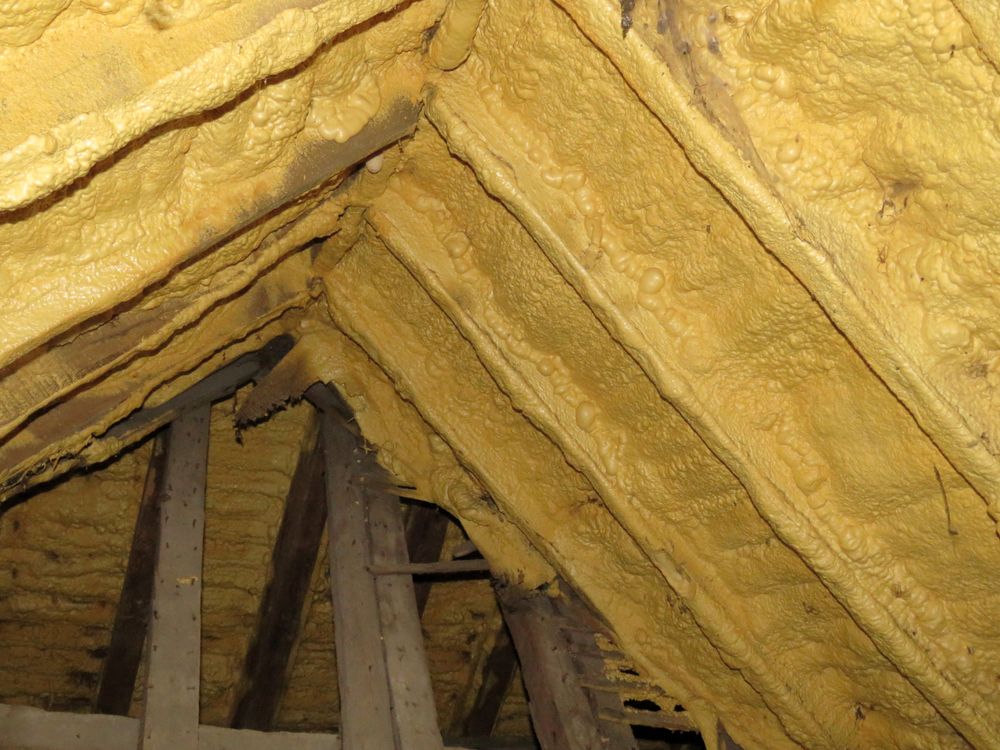
Spray foam insulation is sprayed onto a surface wet, where it dries and expands to seal tiny gaps and cracks that increase your energy costs.
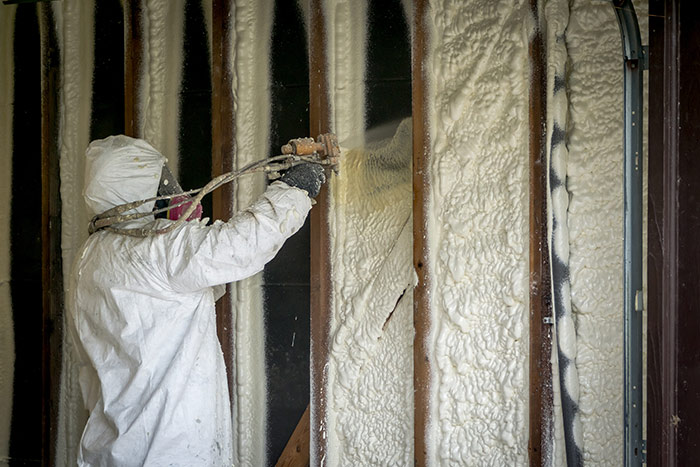
Spray foam insulation is created by mixing two chemicals, which are sprayed under pressure into crawl spaces, walls, and attics to form an effective thermal barrier. Spray foam will stick to nearly anything, so there are no fasteners, measuring, or cutting required.
Inadequate insulation costs homeowners hundreds of dollars each year by allowing treated air to escape outdoors through tiny air leaks. Spray foam insulation seals these leaks and adds insulation value to the space, keeping the treated air indoors.
Whole house spray foam insulation projects are typically done by professionals, as the installation process is involved and potentially dangerous. Do-it-yourself spray foam insulation is not a beginner DIY project, but those with advanced skills can do it.
Here we will describe some do-it-yourself spray foam insulation options, and provide some advice to help avoid common problems.
Is Spray Foam In a Can the Same As Spray Foam In a Kit?
The spray foam you buy in a can is not exactly the same as the foam you buy in an insulation kit. Spray foam insulation in a can is open-cell spray foam, which expands more and is less dense than the kit version. Open cell foam is best for filling small gaps and cracks.
Spray foam kits use closed cell spray foam, which has a higher R-value by volume than open cell, so you don’t need quite as much of it to achieve the same R-value. Also known as low rise foam insulation, closed cell foam is best for whole-house insulation.
Can You DIY Spray Foam Insulation In an Attic?
If you have DIY home repair experience, you can install spray foam insulation yourself. Installing spray foam insulation requires the skill and patience to prepare the surfaces, set up the equipment, and use the material safely.
DIY spray foam insulation is installed using a kit designed for homeowners. DIY spray foam kits do not require training to use, but you will need to practice a bit. Spray foam insulation kits include the materials, hoses, and spray gun you need to do the job safely and effectively.
Spray foam insulation kits are very effective, but about half of the effort is required before you even unbox the kit. DIY spray foam insulation requires prep work, practice, and patience, but you can do it. Each kit is slightly different, but most (if not all) will follow a similar process.
To DIY spray foam insulation, you’ll need to follow a few rules to avoid injuring yourself or your attic.
Cover Any Systems In Your Attic
Spray insulation will stick to virtually anything, so you must cover anything in your attic that could be damaged by overspray, like your HVAC air handler. You may also have HVAC dampers, alarm horns, and dormer windows that must be covered with a disposable drop cloth.
Personal Safety
Spray foam is caustic to your lungs, so a respirator is also required. DIY spray foam insulation will ruin your clothes, so a full body Tyvec suit is recommended, as well as gloves and eye protection.
If your attic does not have a floor, do not attempt to walk across the ceiling joists. Installing DIY spray foam requires your full attention, so place temporary walk boards across the joists to prevent accidents.
Practice
You’ll want to practice, especially if you have never used a tool like a paint sprayer or insulation hopper before. Proper technique is required to fill the space as needed. Time spent practicing will help avoid wasting material that must be trimmed away later.
Short Work Time
Spray foam expands when it touches the air, so you’ll have a work time of under one minute between sprays. If you have to stop for more than one minute, the foam will harden and you will have to replace the tip on your kit.
Preparation
To avoid stopping, you’ll need clear pathways around the space. Because of the short work time, you’ll need to move efficiently through the space without obstructions. Preparation includes defining a path for the hoses, practice, and a full understanding of your particular kit.
What Are the Pros and Cons Of Using Spray Foam Insulation?
If speed of installation, effectiveness and durability are important, spray foam insulation is the best choice for insulating a large space.
Pros:
- Creates its own vapor barrier
- Reduces caulk
- Installs quickly
- Resists moisture, mold, and flames
- Has more R-value per cubic inch of almost any other insulation material
- Excellent sound deadening
- Long-lasting
- Durable
Cons:
- Requires skill and proper equipment to install
- Caustic to skin and lungs
- One of the most expensive types of insulation
How Do I Insulate My Home Using Spray Foam Insulation?
There are a few do-it-yourself insulation methods that incorporate spray foam. These options are designed to be less expensive than hiring a professional, but they will require some skill and a few tools.
Spray Foam Kits
The most common option for homeowners interested in whole-house spray foam insulation is to use a kit. Most spray insulation kits mix the materials isocyanate and polyurethane together as they exit a spray nozzle. The mixture is activated by contact with air and begins to expand almost instantly as it exits the nozzle.
You will need to cover anything that would be damaged by the foam, like your clothes, the floor, and your tools. Spray foam will adhere to cords, hoses, and your skin, so wear the appropriate safety gear. These include a Tyvek suit, gloves, eye protection, and a respirator.
You’ll need to keep the materials warm, especially in cold weather. The chemical reaction is less effective if the ambient temperature is less than 78 degrees, so the material is often warmed before spraying with electric heat blankets.
Pros:
- No drop in quality compared to professional products
- Can be installed by one person
- Simple operation
Cons:
- Requires lots of preparation
- Expensive compared to other insulation materials
Flash and Batt
Flash and batt is a term that describes combining spray foam insulation and fiberglass batts to reduce the project cost without reducing the R-value. In this method, open cell spray foam is applied to just the corners of the void, and a less expensive fiberglass batt is installed on top.
If you will be insulating an entire wall, seal all of the corners with the foam first before moving on to the fiberglass batts. The applicator tip on the foam can will harden after a few minutes of non-use, so don’t stop until all of the joints are sealed or the can is empty.
Let the spray foam fully expand (between 30 minutes and 24 hours, depending on the foam) before installing the batts. Aim for a consistent thickness with the foam, as this will avoid needing to trim the batts where the foam is too thick.
If the foam expands beyond the space, use a long narrow blade like an insulation knife or serrated steak knife to trim off the excess. Use staples or button cap nails to attach the batts to the wood.
Pros:
- Reduces the materials cost of a project by 25% – 40%
- More effective than fiberglass batts alone
Cons:
- Installs more slowly than using fiberglass or spray foam only
Combining Foam Panels and Spray Foam
Using a combination of spray foam and foam insulation panels provides an R-value comparable to using only spray foam. Foam panels are less expensive by volume than spray foam because they are made in a factory. Combining foam panels and spray foam can reduce the project cost by 20% -30%.
Most DIYers use 2” thick closed cell foam panels, as they provide an R-value of 12. If your local building code requires minimum R-13 insulation in the walls, you can add R-6 by gluing another 1” thick panel on top of the first.
You’ll need to leave a ½” gap around the edge of the panel between the wood and the panel to allow for the bead of foam. To leave a gap, subtract 1” from both the length and the width of the panel and center it in the space before securing it with the foam.
In this method, spray foam is applied in the corners as before, but a small layer is also applied to the back of the space to be used as adhesive for the first panel. Lastly, fill the ½” gap around the panel with foam.
Pros:
- Reduces the cost by 20% – 25% compared to using spray foam only
- Installation is simple
- Provides a vapor barrier
- Can be installed over wires and pipes without damaging them
- Works best in 2” x 6” walls
Cons:
- Does not install as quickly as using only spray foam
- Foam panels are often in inconvenient thicknesses for 2” x 4” walls


