Insulation is vital in any modern home; every house has to have some for the occupants to be comfortable. But, are you installing your fiberglass as well as you could be?
Installing fiberglass insulation may seem easy, but if you’re trying to get optimal performance and efficiency out of your insulation, every little detail matters. Moreover, if you’re not careful, you might risk not only higher energy bills, but your health.
What are the best ways to install fiberglass insulation? How do the professionals do it? Are there any specific tools you can use to make your job easier? What kind of fiberglass insulation works best for your job?
With these twelve great tips, you will be a professional fiberglass insulation installer in no time!
1. Always Use Proper Safety Equipment
If you want to install insulation like a professional, your first goal should always be to arm yourself with the proper protective equipment (also known as PPE.)
Fiberglass is a loose substance, and its fibers can irritate human skin, eyes, or organs.
When installing fiberglass insulation, always wear long-sleeve shirts and pants, boots, and all necessary facial coverings.
Safety glasses and a mouth covering are vital, as breathing in fiberglass is dangerous and can seriously harm your health. A respirator is a powerful tool, but an N-95 mask will do just fine.
2. Know When To Choose Rolled, Batted, Or Blown-In Fiberglass Insulation
Not all insulation is created equal. Fiberglass may be the most common type of insulation, but it comes in many forms that are more useful in some scenarios than others.
A roll of fiberglass insulation is best used for long, open spaces with minimal cutting- such as attic joists or the ceiling of your basement.
Fiberglass batts, which are essentially rolls that were cut to fit a certain space, are optimal for smaller spaces, such as walls.
Blown-in insulation is loose and formless, making it an excellent option for bare, insulation-free attics. Flat, consistent spaces are best for blown-in insulation because loose-fill fiberglass requires gravity to stay in place.
Fiberglass batts, however, can be stapled in any configuration, even upside down.
3. Do NOT Compress Your Batting!
When using any form of fiberglass insulation, but especially batting, do not flatten your fiberglass batting.
Minimal amounts of pressure for small increments of time are fine, but compression decreases the R-value of your insulation and reduces its efficiency.
Sometimes compressing your insulation can help with cutting it but as a whole, it’s best to avoid flattening fiberglass insulation as much as possible.
4. Insulate Your Windows And Doors
Air doesn’t just transfer through your attic – your windows and doors are prime spaces for air transfer.
If left uninsulated, your windows and doorframes can both raise your power bill and make your home’s temperature more difficult to maintain.
Cut your insulation into thin strips and use a putty knife to stuff it into any openings between your windows and doorframes.
Ensure that the insulation fits snugly but not too tight- remember that compressing insulation can ruin its efficiency.
Learn More on How to Insulate Your Windows for Summer.
5. Split Your Insulation Around Obstacles
Occasionally, obstacles will pop up in the path of your insulation.
Whether these are ledges or electrical wires, it is best that you split your insulation and install it around the obstacle rather than plastering it over.
Can Insulation Touch Electrical Wires? Safety Tips
If you install your insulation over an obstacle, you create minute uninsulated spaces that can leave an uneven effect on your insulating job.
If your obstacle is an electrical wire in the middle of where you would put a batt or a roll, split the insulation in two by its shortest dimension and place one half on each side of the obstacle- almost like you’re draping it over the electrical wire.
Otherwise, you can simply cut your insulation into smaller pieces.
If you already have insulation in place and need to finish your wiring, learn how to fish electrical wire through a wall with insulation.
6. Stay Away From Hot Objects
You should know that fiberglass insulation is not entirely fireproof. At high temperatures, fiberglass insulation will melt and release toxic fumes. However, it’s more fire-resistant compared to other insulation materials such as untreated rigid foam board.
Fiberglass batt insulation typically comes with a paper vapor barrier that will burn, although it’s treated with a fire retardant.
When installing fiberglass insulation, you must keep it away from any sources of heat.
Do not insulate areas next to water heaters, boilers, or HVAC systems. Don’t use fiberglass around a gas pilot light or any source of an open flame. The backing of fiberglass insulation is particularly flammable and can easily start a catastrophic fire in your home.
7. Fill Any Small Gaps
Sometimes a home’s architecture is odd. An oddly-shaped attic or basement can leave small places that are unwieldy for rolls or batts to fill.
In these cases, you may elect to use blown-in fiberglass insulation. However, this measure is expensive and can be overkill for small spaces.
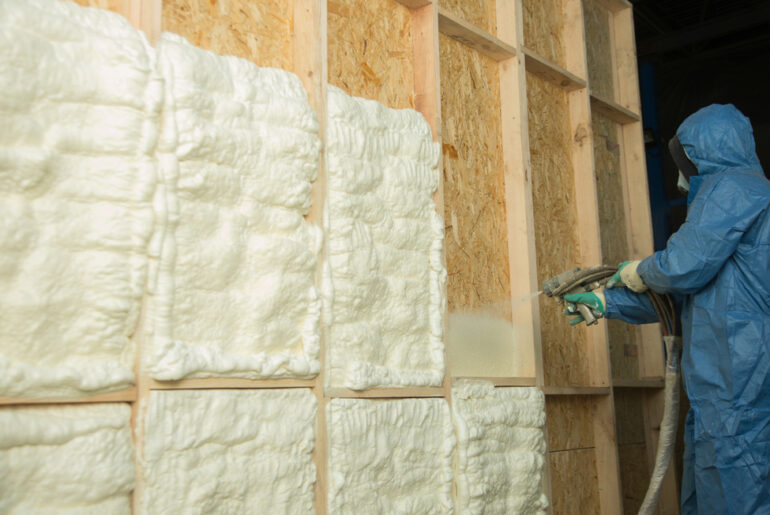
If you don’t want to spend extra money on blown-in insulation, consider filling any particularly small gaps in your insulation with expanding foam.
Expanding foam is a relatively cheap insulating material, especially when filling small spaces, and is compatible with your existing fiberglass insulation.
8. Avoid Removing Your Old Insulation
When applying a new layer of insulation, it’s best to simply lay your new fiberglass on top of any old, existing insulation. This extra layer helps build efficiency; however, exceptions do exist.
If your previous insulation has suffered water damage resulting in mold or mildew growth, you should remove it for health and efficiency purposes. Mold can cause health issues and spread to your new layer of insulation.
Additionally, blown-in insulation is okay to place with no previous layer. The loose nature of blown-in insulation makes it an efficient choice for new homes or bare attics.
9. Cut Batts Longer Than Necessary
When using batting insulation, you always want your batts to fit in their dedicated spaces. However, cutting your batts can be tricky; if you cut them only slightly too small, your home becomes ineffectively insulated.
Aim to cut your batts roughly half an inch larger than necessary. You must still cut your batts to ensure they are not too large; an oversized batt will face compression or awkward positioning that can reduce your insulation’s effectiveness.
A slightly-oversized batt ensures a snug fit while preventing gaps in your insulation and efficiency-ruining compression.
10. Use A Vapor Barrier With Your Insulation
While fiberglass is a trusted method of insulation, it is, unfortunately, not waterproof. This scenario is where vapor barriers come in handy. Almost all fiberglass batts are faced, which means they already include a vapor barrier, but once in a while you might stumble on unfaced fiberglass insulation and will need to install a vapor barrier yourself.
A vapor barrier is a material that entirely blocks or otherwise mitigates water’s movement into a specific area. By utilizing a vapor barrier with your fiberglass insulation, you can protect it from storms or leaks that would result in costly water damage.
Additionally, many vapor barriers are insulating in and of themselves, giving you an extra layer of insulation in your home.
11. Cut Like A Pro
It’s easy to cut your insulation with scissors or a single razor blade. However, it’s also easy to mess up.
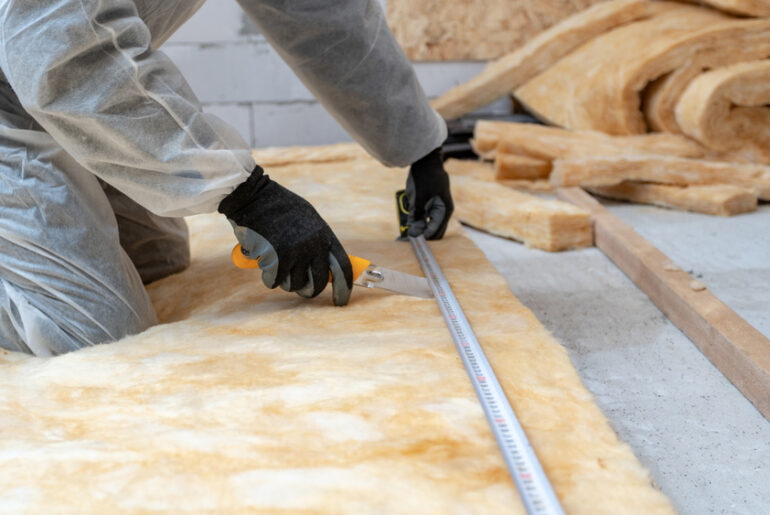
When cutting your fiberglass insulation, your best option is a retractable utility knife with a fresh supply of sharp blades. Fiberglass insulation is typically four inches thick, so ideally you should have three inches of blade.
Kneel on your fiberglass insulation to lightly compress it- without permanently flattening it- to reduce its thickness. Cut along your necessary lines with a fresh, sharp blade. Your insulation will be the perfect shape and size.
12. Insulate Your Garage
Your garage might be the last place you think about insulating. After all, it’s only your car and a few other things- they can withstand odd temperatures.
But the garage can be turned into a comfortable space by simply insulating it.
Because insulation reduces energy loss, it also helps to reduce your utility bills. There will be a noticeable difference between your house and the attached garage if there are boundary walls.
You can reduce the amount of energy you use to heat and cool your home by insulating key areas of your attached garage. Consider insulating as much of your garage as possible, from the ceiling to the frame of your garage door.

