
Yes you should. The R value of an uninsulated 8 inch thick concrete wall is 1.35. Meaning that the temperature of the inside of the wall is pretty close to the temperature outside.
Rigid foam–when installed properly– provides one of the best wall insulations available. Many products are R-5 to the inch, and will act as a vapor barrier. Foam is easy to install, leaves very little waste, and does not itch.
Rigid foam panels can be installed directly onto concrete walls or onto wood framing. Either option will make your basement warmer and more comfortable.
Although insulating basement walls with rigid foam is fairly easy, these suggestions will make it go even smoother.
Should You Insulate Basement Walls With A Rigid Foam?
A combination of polyethylene, fiberglass batts, and 2 x 4 studs is still the most common basement wall insulation system. But rigid foam is becoming more popular quickly.
Rigid foam is a good choice for the basement
Whether you are applying insulation directly to concrete or onto an existing wood frame, rigid foam is one of the first options to consider.
- Excellent R value. Extruded foam is R-5 per inch.
- Easy DIY installation. Light and easy to handle. Requires few tools.
- Very little waste. Minimal waste with a little planning.
Basement wall insulation is a code requirement
According to the International Residential Code, all finished basements in climate zones #3 and higher require basement insulation. (Table 1102.1.3)
- Zone 3: R-5
- Zone 4 (not including Marine Zone 4): R-10
- Zones 5, 6, 7, 8 (and Marine Zone 4): R-15
Note: Section 1102.2.8 provides the exception to the code. If your basement is unfinished and insulated from the main floor (including things like the underside of stairs), the walls can remain bare.

Some local building codes require all basement walls to be insulated. I live in an area where all new construction basement walls must be insulated to R-12 minimum.

Courtesy of ashrae.org (American Society of Heating, Refrigerating, and Air Conditioning Engineers)
Alternatives to Rigid Foam
6 mil poly, stud framing and fiberglass batts are marginally less expensive. DIY installation is more time consuming. If done properly, the system will provide warmth and comfort for years–with no problems. Improper installation will cause problems–especially if you have moisture issues.
At some point you may have to rip it out and replace it. Condensation or water leaks will soak into fiberglass insulation. Enough moisture weight and the batts will sag or collapse leaving uninsulated sections. Even where you still have wet fiberglass batts, the insulation value is zero if they stay wet.
For example, our house is 15 years old. It has framed and fiberglass wall insulation which I installed. The basement is warm and dry. I expect it to stay that way.
Another excellent option is spray foam. A professional installer will foam your entire exterior wall–with or without studs. It is more expensive, but completely seals and insulates the walls.
Note: Your concrete walls need to be dry for either of these solutions to be truly effective.
When To Choose Rigid Foam For Basement Insulation
Rigid foam should almost always be your “go to” basement wall insulation choice.
- Versatile. Install directly to concrete. Nail to farming. Go over existing drywall or paneling.
- Easy to Install. Glue, screw, or impale directly to concrete. (Masonary nails may work in concrete blocks. Unlikely in older concrete.) Or nail to studs.
- Cost Effective. Best R value per inch. Quick installation.
- R-Value. R-5 per inch.
- Water Resistant. Most rigid foam can get wet repeatedly and never lose its insulating ability. Unless you trap moisture between layers.
Note: Rigid foam must be protected from sunlight. Foam degrades, powders, and loses its insulating properties in direct sunlight.
What Rigid Foam To Use for Basement Insulation
There are three popular types of rigid foam you can use:
- EPS. (Expanded Polystyrene) High density has an R value of 4.2 per inch.
- XPS. (Extruded Polystyrene) High density R value is 5.2 per inch.
- ISO. (Polyisocyanurate) is a foil faced product with a starting R value of 6.8 per inch. Unfortunately, within 5 – 10 years it may degrade to R 5.5 per inch as some of the gas used in manufacturing seeps out and is replaced by air.
Higher R value equates to a more expensive product.
All closed cell foam qualifies as a vapor barrier when it is 2” thick or more. Except in zone 3 (see map), you will need more than one inch of rigid foam. Meaning you can probably eliminate hanging poly on your concrete wall before installing foam board.
XPS or ISO are usually better choices than EPS because of the increased R value. They are more expensive but there is another advantage. You save floor and room space by using thinner products.
Overall, XPS is the best choice. It combines consistent R values with reasonable prices. EPS foam does not quite meet the R values needed. ISO products are more expensive initially and the R value will degrade almost to that of XPS.
Please see our detailed article comparing XPS, EPS, and ISO.
How to Insulate Basement With Rigid Foam
You will have one of two types of basement wall applications.
- Bare concrete walls. Provide the option of applying rigid foam sheets directly to concrete.
- Wood framing. Existing wood walls next to the concrete.
Closed cell foam is a fairly benign product, but some people may react to it. Consider using safety equipment–N95 mask or respirator, gloves, hazmat suit.
Note: The glue is low VOC (Volatile Organic Compound), but it still will off-gas a certain amount.
Tools and material you will need.
- Foam board of your choice. Allow about 5% extra for waste. Most foam boards are available in 2’ x 8’ sheets and 4’ x 8’ sheets. Some–like Styrofoam SM–are available with shiplap edges on all 4 sides.
- Glue. Loctite PL 300 Foam Board Adhesive or equivalent. And a caulking gun.
- Utility knife and/or hand saw and/or 6” serrated knife.
- Window and door spray foam. (such as Quad)
- Tape measure.
- Straight edge. (6” level or T-square or chalk line).
- Foam joint tape.
- Roofing nails–if applying on stud framing.
Note: Foam boards with shiplapped edges will provide a much better insulation blanket and vapor barrier because any gap will have foam behind it. Your spray foam will be more effective.
Bare concrete walls
Applying foam appear to be a challenge to someone with a hammer and nail mentality. In reality, applying rigid foam to concrete can be quick and easy. Just follow these steps:
- Clean the Wall. Dust and spider webs adhere to concrete. Use a wide shop broom to clean the walls off. (Do not wet the walls. The dust will stick, then dry, and glue will not adhere.) Knock off lumps from form ties or anything else. Make sure the floor is clean next to the wall before installing your rigid foam panels.
- Check Wall Height. Most basement walls are 8’ high or less, making 8’ sheets a natural fit. Cut sheets to the proper size. Higher ceilings will require additional foam to finish the wall.
- Install Vertically. Apply 5 horizontal lines of glue and 2 vertical lines (about 4” from edges). Beads of glue should be around ¼”. (Do not apply more glue than can be covered by one sheet. If left too long it can skin over, reducing effectiveness, and causing uneven application.) Press each sheet firmly in place. Glue can be applied on the wall or back of the foam panel.
- Foam Joints and Penetrations. Use spray foam to seal all joints and penetrations. If the joint is too tight, you may want to cut a small V to accept foam, use acoustic caulking, or just leave it to be taped. Once the foam is dry, cut off any excess to leave a smooth surface. Foam between the rigid board and floor for a complete seal.
- Tape Joints. Taping all of the joints and penetrations completes your insulation and vapor barrier.
- Make sure your walls and floor are clean.
If you do not completely trust glue alone, add some self-impaling clips to the wall. These clips are attached to the wall with special glue. Rigid foam panels are installed on them. A large washer slides onto the nail and any excess pin is cut off.
Or use a Hilti powder actuated gun with foam holding pins. Or self-tapping concrete screws and washers. These need holes predrilled into the concrete.
Now you can add whatever necessary framing is required to finish the basement. 1 x 2 may be enough, but it could be a bit flimsy to hold drywall. 2 x 2 or 2 x 4 on the flat are better options. (Note: Any wood that comes in contact with concrete must be pressure treated.)
Note: I would not use 2 x 2 either. Some of it tends to warp into a replica of Robin Hood’s bow.
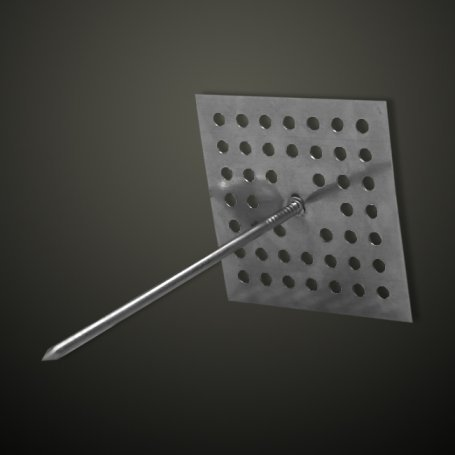
Courtesy: pyrotecnc.com (Self-impaling pin)
Wood framed walls
Some basements have a wood framed wall installed against the concrete. It may be bare framing. Or batt insulated. Or finished with drywall or another product. Your options are:
- Remove it Completely. Removing the entire structure gives you the opportunity to start from scratch and insulate properly using the concrete wall method described above. You may also find that the existing framing is shoddy, and trying to save it is not worth the effort.
- Remove the Drywall. If you feel that the framing is OK, and the concrete wall is dry, you may want to consider removing the drywall only. Then you can add either batt insulation or cut rigid boards to fit between studs. By pressing rigid foam into the cavities and spray foaming the perimeters, you have improved the R value.
- Cover It. The easiest way to approach a finished wall is to add rigid foam boards right over the existing finish. Then drywall again. You will add to the R value but in exchange you will lose floor space. You will need very long fasteners.
Although you can use glue on raw studs or drywall, roofing nails every 12” into the studs should be sufficient to fasten rigid boards in place.
For this type of application, install the foam horizontally like drywall. It is easier to hit the studs. If you have to cut foam shorter, there is less waste. Spray foam and tape the joints as described above. Then finish your wall with drywall, paneling, stone, or wood.
Note: You may need to add another layer of framing over your rigid foam if it is too thick. If you are adding 3” of foam over existing drywall, then adding ½” drywall, you will need a 5” drywall screw to get into the framing. They are difficult–if not impossible–to find.
Regardless of what insulation method you choose, you will have to extend the window frames to the inside of your new wall. Make sure you spray foam them well.


