While interior insulation is the most practical, economical, and preferred method, insulating the roof from the outside offers a number of benefits that homeowners will love too.
Insulation of the roof from the outside is an easy yet costly method. The system is composed of three materials: a waterproof membrane on top, a vapor barrier beneath, and the insulation material sandwiched in between. And depending on the roof’s shape and design, the method varies as well.
Planning to add exterior insulation on your roof? This article covers everything you need to know about roof insulation from the outside.
Why External Roof Insulation Is Crucial?
The insulation of the roof from the outside, also known as exterior roof insulation and warm flat roof, is also possible just like walls. And while it is not as common as interior roof insulation, many homeowners find its benefits way better and more reliable compared to insulation from the inside.
Exterior roof insulation, for example, is much more practical in terms of saving energy. It essentially acts as an extra layer that helps to maintain a stable and comfortable indoor temperature. It could achieve higher insulation levels as well. The risk of mold development due to moisture is also unlikely assuming proper installation.
Insulation outside of the roof is ideally suitable if you are planning to renovate an existing roof. It is also highly recommended for houses with flat roofing or those without attics. And since it is installed in the exterior part of the assembly, it is ideal for those who do not want to let insulation take up large space in the attic.
Furthermore, exterior roof insulation is composed of two elements too—an insulation material and a pliable, damp-proof membrane which is also called “sarking.”
Sarking and Its Role in Exterior Roof Insulation
As mentioned earlier, exterior roof insulation is composed of two parts. One is the installation of the insulation material itself, and the second is the application of a moisture-proof membrane which is also known as “sarking.”
In roof construction, sarking is a term with multiple meanings. But in exterior roof insulation, sarking refers to the installation of a pliable membrane—a material made of either polystyrene or felt with reflective foil on one side or both—beneath a metal and tiled roof. It serves as a second layer of sheathing, which protects the home from excessive moisture, dust, and even drought.
Sarking, while not as efficient as traditional insulation materials, is also classified as a type of insulation system. It can reflect the sun’s radiant heat, which improves the house insulation’s overall thermal performance.
Moreover, the term sarking—although by definition, is a different type of roof sheathing—is also used interchangeably with the term exterior roof insulation.
The Benefits of Insulating Roof From The Outside
As mentioned, insulating the roof of your house from the outside provides several perks. A few of these benefits include reduced thermal bridging, increased thermal performance, and energy efficiency.
Here’s why exterior roof insulation is beneficial for you and your family.
1. Decreased Thermal Bridging
In terms of thermal performance, insulating the roof from the outside does provide better levels of efficiency compared to interior insulation. And since it acts like a coat, it can dramatically decrease the movement of heat across objects, e.g. across the roof through the attic and living spaces, a process known as thermal bridging.
Exterior roof insulation, also helps maintain the thermal inertia of the assembly as well as enhances its porosity which, in return, helps regulate the humidity level in the house.
2. Improved Efficiency of the House’s Overall Insulation
As a result of reduced thermal bridging, exterior roof insulation can significantly enhance the efficiency of a house’s overall insulation. It is specifically true in the roof’s rafters since the purlins and trusses are protected as well.
It is more effective in saving energy too, compared to interior insulation alone.
3. Aesthetically Pleasing
Functionality aside, insulating your roof from the outside can also give your house exterior a unique and eye-catching design. It is ideal for old houses with roof timbers that are intricately designed.
Painted roofs are overrated and do not stand out as well. Thus, if you care about your house’s exterior design, better opt for exterior roof insulation.
4. Does Not Take Up Too Much Space
Lastly, insulating your roof from the outside, unlike interior roof insulation, leaves more space. The standard thickness of insulation material ranges between 15cm and 20cm.
How to Insulate Roof from the Outside: Roofing Materials Options
There are several roofing materials that you can use to insulate your roof from the outside. Asphalt, panels, reflective foil, and breathable underlayment are a few.
Here’s how each material differs:
- Asphalt underlayment. As its name suggests, this roofing material is made of asphalt. It is waterproof and known to provide excellent protection from moisture as well as pollen, dust, and sand. It makes a great insulation material too.
- Sandwich panels. Sandwich panels are a three-layer roofing product with a thermal-insulating material as the core while both sides are covered with sheet metal. It is typically used to clad walls as well as roofs.
It is designed for optimal thermal performance and is easy to install.
- Reflective foil. Reflective foil is an insulation material made of aluminized polyester or aluminum foil. It is excellent roofing insulation due to its ability to resist radiant heat gain—the heat the sun produces. It is easy to install and extremely flexible as it can adapt to all roof shapes.
- Breathable roofing underlayment. A breathable roofing underlayment is a material built to prevent condensation or the accumulation of moisture, in layman’s terms. Essentially, it allows moisture or water vapor to escape through the roof’s barrier. Using such material can prevent roofing problems, such as mold and mildew, caused to moisture.
How to Insulate Roof from the Outside: Insulation Options
Roof insulation from the outside can be done in different ways. In this section, you will learn the difference between the three methods of exterior roof insulation.
Thin Insulation
As its name suggests, thin insulation is a type of system that uses the slimmest material by combining reflective foil and polyethene foam. Physically, the foam is toughened using a mesh with both of its faces covered using aluminum foil. The materials are made by melting and mixing the two with no other binding materials to preserve both materials’ varying components.
Thin insulation is an excellent thermal solution for almost all types of heat transfer due to its material composition. These are radiation, convection, and conduction. Such a type of insulation method also serves as a vapor barrier—which controls moisture and condensation—as well as a roof membrane.
Moreover, installation is quick and easy. It is extremely versatile too as it can adapt to all types of roof shapes.
Above Roof Deck Insulation
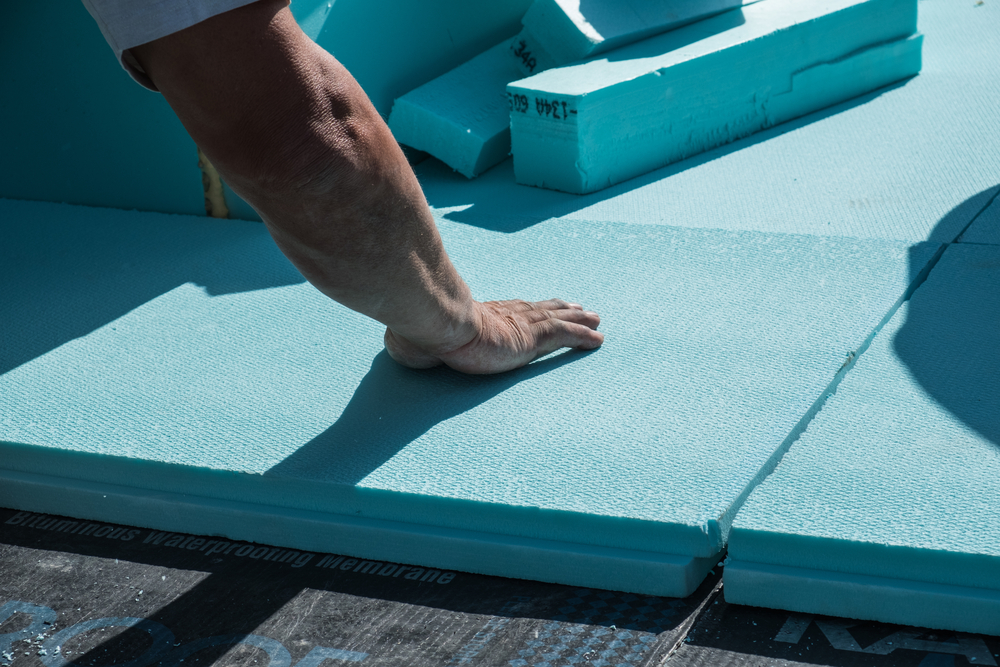
Installing rigid foam on top of the roof deck is an insulation method that is typically used to add sheathing material on existing roofs. It is also suitable for homes with conditioned attics as well as areas that are meant to be insulated.
The most common material in covering roof decks is rigid foam. Fiberglass, gypsum board, mineral wool, and perlite board are a few of the alternatives you can use to insulate the top of the roof deck too.
Rigid Foam on Top of Sheathing
Houses with unconditioned attics traditionally don’t need any kind of roof insulation. The floor is rather insulated. Today, however, builders highly recommend the insulation of the roof following the sloping roofline. Such a type of roof sheathing is known as insulation above the roof sheathing.
Insulation above roof sheathing—specifically using rigid foam—is preferably applied on roofing assemblies with a low slope, as well as those with cathedral ceilings. Although there are several different roof insulation methods you can use for the mentioned roof shapes.
That said, builders often recommend it due to its numerous thermal and condensation benefits. It can, for example, keep the sheathing dry and warmer even during the cold season compared to interior insulation alone. It also helps stop thermal bridging through the rafters to avoid condensation.
Flat Roof vs. Pitched Roof: A Basic Guide to Roof Insulation
Installing roof insulation from the outside is a popular insulation method specifically for modern commercial buildings, as well as residential spaces. Not only because it is the most appropriate but also because it is the easiest and quickest method.
The method of installing insulation from the outside, however, varies depending on the type of roof. Pitched roofs, flat roofs, and houses with cathedral ceilings are the most common designs for which builders recommend the use of exterior roof insulation.
A Step-by-step Guide to Flat and Low Slope Exterior Roof Insulation
There are two different ways to insulate a roof from the outside for a flat and low slope. And it depends on whether the attic is vented or unvented.
Option 1. Exterior Roof Insulation for Unvented Attic
Insulation from the outside of the roof will be composed of three materials: a waterproof membrane which will be placed on the top layer, a vapor barrier, and an insulation board in between the waterproof membrane and the vapor barrier.
- For an existing roof, the first step is to strip the roof down to the wood deck.
- Next, assess the deck and see if there are damages. If necessary, fix any damages immediately.
- Once done, install a vapor barrier.
- On top of the vapor barrier, simply place your chosen insulation material. Make sure that it is installed with a slope.
- Finally, place a damp-proof membrane on top of the insulation.
Option 2. Exterior Roof Insulation for Vented Attic
- First, strip the existing roof down to the wood deck. Then remove the boards installed in the entire roof deck.
- Next, clean the attic of debris and dirt as preparation. This step is important as mold and mildew feed off grease, dirt, and debris.
- Once done, simply lay two rows of 2x4s crossed on the whole deck. Make sure to leave a slope of one to two percent towards the drain.
- Lastly, install the new plywood over the entire area.
Note: To efficiently insulate a flat roof with vented attics, it is important to remove (at least) a good part of the wood deck. It allows easy and much more convenient installation of insulation material.
Different Ways to Insulate Flat and Low Slope Roof from the Outside
Exterior Rigid Foam
Following the above-roof-sheathing method, you can insulate a flat roof by placing rigid foams on top of the roof sheathing. The typical thickness of rigid foam builders used is six inches. Although it can go higher if necessary.
Exterior Closed-cell Foam
For a lazy type of roof insulation method, spraying closed-foam cells on the roof sheathing is another great alternative. To make it more efficient make sure that it has a layer of air-permeable insulation below, which is also in direct contact with the sheathing.
Exterior Rigid Foam With Interior Insulation
For weatherproof roofing, combining exterior and interior insulation is another method. Simply place a four inches thick layer of rigid foam on top of the roof sheathing. For the interior, add a layer of air-permeable insulation below the rigid foam. Make sure it is in direct contact with the sheathing.
A Step-by-step Guide to Pitched Roof Exterior Insulation
Insulating a traditional pitched roof from the outside is virtually similar to how you insulate a flat roof. The system is composed of three materials: insulation material, vapor barrier, and waterproof membrane.
- First, remove the old battens, counter battens, tiles, and slates. This will expose the roofing’s purlins and trusses.
- Once done, simply create a sloping base. Do this by nailing boards on the roof’s rafters. Wooden panels will work too.
- Next, place and fasten the waterproof membrane into the sloping base.
- After that, lay and install the insulation material on top of the membrane. You can use any kind of insulation material for outside roofing. Although builders typically use rigid panels that are either made of wood fibers, polyurethane, or extruded polystyrene.
- For the final step, place and fasten a new set of battens and counter battens to a rain screen membrane.


