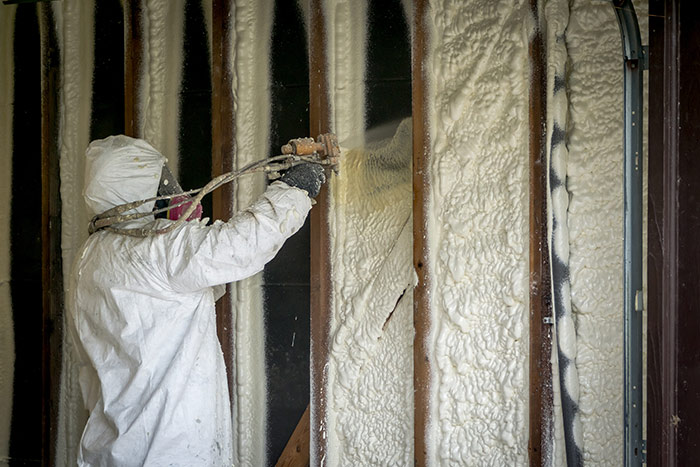
Spray foam is a popular insulation product readily available for either a skilled amateur or a professional home renovator, but is it the right choice to retrofit a garage ceiling?
When deciding to upgrade a garage space, insulating the ceiling can be an excellent way to add value to a home while saving money on expensive heating and cooling systems.
With all home upgrades, the key thing to remember is that good preparation makes for a better outcome every time. Spray foam comes with several advantages over other products on the market, but it’s pricey. Is it worth the investment?
Here’s everything you need to know about how to insulate a garage ceiling with spray foam.
Why Insulate the Garage Ceiling At All?
If your garage is an integral part of the home, perhaps there is living accommodation above the garage, then it is probably sensible to insulate the ceiling. In many older houses, it’s likely this has not been done.
Garage ceiling insulation is required by the International Building Code if it’s attached to the home and/or there’s living space above it. In other cases, the local jurisdiction may not impose building codes or the home predates them.
Insulating the ceiling not only protects against heat transfer but could reduce noise and the risk of carbon monoxide poisoning when a bedroom or other living space is located directly above an uninsulated, leaky garage.
Should the garage be built adjacent with connecting doors to the main living space, it depends on how much the garage space is used by the people living in the house. Insulation could improve comfort levels and moderate temperature changes.
If your garage is a freestanding building, then it depends on what you are going to use the space for. If it is a working area, a repair shop, or a place for hobbies, then it’s probably a good idea to insulate.
In this case, it would be advisable to look at upgrading the doors and windows too.
Unless your garage ticks any of these boxes it is probably not going to make much difference whether the ceiling is insulated unless you need to protect against extreme temperature changes throughout the year or supply supplemental heat. In this case, insulation could help to moderate any impact.
Spray Foam For Garage Ceiling: Pros and Cons
Pros:
- It doesn’t matter too much what the ceiling of the garage is made of as long as it is structurally sound, and clean and there is no evidence of moisture or mold growth.
- A one-inch application of spray foam can provide up to an R-7 insulation level that will not degrade over time.
- Applied properly, spray foam can provide a vapor barrier, reducing the effect of mold and mildew on the structure of the building.
- It can boost rigidity by up to 300%, improving the structural integrity of your garage.
- Spray foam has a built-in fire retardant and is resistant to high temperatures.
Cons:
- Spray foam is not cheap. The price per square foot can be a lot higher than fiberglass, so it is worth shopping around and taking advantage of any discount or promotional codes you can find.
- Spray foam requires a lot of prep in an open space like a garage, which can take time. Make sure you have enough time to do a proper job. Spraying the foam is the fastest part.
- Spray foam can hide or trap problems; you need an eagle eye on the job to spot them before an inch of spray is applied.
- Open cell spray foam can absorb and retain moisture. If you are in a maritime or high humidity area, then a closed cell spray foam is probably the best way to go.
- If not applied properly there is a risk that the foam will not cure properly, leading to possible issues of delayed off-gassing. Make sure you, or your installer, follow the instructions to the letter.
- While spray foam has fire retardants in its make-up, other insulation products outperform it with regard to fire safety.
How to Successfully Use Spray Foam For a Garage Ceiling
Preparation, preparation, preparation. These are the three magic words when getting your garage ceiling ready for spray foam insulation.
- Clear everything out of the garage that you don’t want covered with spray foam. It goes on easily but is difficult to remove once it has cured.
- Take a broom to the ceiling and clear out all the cobwebs.
- Remove, or fix, any loose items. Close up any penetrations with caulk.
- Thoroughly inspect every inch of the ceiling. Once the spray foam has been installed it will never be seen again.
- Ensure any issues discovered in 4, have been resolved. Once satisfied that the ceiling is structurally sound and that there are no problems, continue to 6.
- Tape up any electrical outlets, control panels, windows etc.
- If you have a one piece or sectional door, cover it with a sheet of polythene and protect the door gear and associated equipment.
- Cover any internal connecting doors. You might want to tape over keyholes too.
- Sheet up the floor and any windows. Use duct tape to stick the edges of the polythene to the floor. A low-tack spray adhesive can be used to ensure the sheet edges do not lift when the foam spraying starts.
- If you plan to board over the ceiling after the installation, it is a good idea to run duct tape along the face of the rafters to protect them from over-spray. It will save time later.
- Bag up the lighting fixtures in clear plastic.
- Check your building codes. Some areas require a minimum gap between light fittings and insulation.
- Once your garage space is clean, taped and sheeted, then you are ready to go.
- It is recommended that whatever personal protective equipment (PPE) is supplied by the manufacturer, you invest in a proper respirator mask and goggles.
- Before you start spraying, discharge a little of the spray foam into a waste bag to ensure the mix nozzle is performing correctly. You do not want a poor mix on the ceiling as part of the permanent work. It could cause curing problems later.
- If the garage ceiling is corrugated or other pressed metal profile, then ensure you hit the low spots first before going back over the area a few moments later.
- Keep your movements steady. It’s a similar process to spray painting an area. Make sure to coat the ceiling evenly.
- Preparation of the garage, before you have sprayed anything, takes time. Wielding a spray gun over your head is tiring. Make sure you have given the job enough time. No-one wants to still be working at midnight.
- Once the spray foam installation is complete it hardens off very quickly. A second coat, if required, can be installed straight away, and any low patches filled.
- Remember to ventilate the garage while installing the foam. Spray foam uses Isocyanates, which can be harmful if breathed in, so it is best not to solely rely on your PPE.
- A treated space will need to be ventilated for at least 24 hours and it is advised that the home is vacated for the duration of the work. This includes all pets as well.
- Before you remove all the protection from the electrical outlets or the doors and windows, do a final check that all areas to be covered have been covered. You don’t want to have to do the job twice.
What Are Alternatives to Spray Foam?
Fiberglass
If you have a limited budget then fiberglass is a good option in most cases, however, it won’t give you the air sealing performance or R-value compared to spray foam. You will also need a vapor barrier and cover it up with drywall or other paneling products to protect it from dust or other damage.
Rockwool
Similar to fiberglass, but a step up in performance and durability.
Solid Foam
Solid foam boards are another less expensive alternative, but as with fiberglass and rockwool, this installation will take longer and will not provide the same sealing qualities. It is more durable than either fiberglass or rockwool, and does have a better R-value.
Fitting solid foam boards can be difficult, especially in an older house where the direction of the beams may not be perfectly straight. It would be sensible to use tins of foam to fill any gaps before installing the panels, and sealing around them prior to enclosing with drywall.
Reflective Sheeting
Reflective insulation that comes on a roll is another inexpensive way to insulate the ceiling, but again, it will not provide the air sealing or the R-value that can be achieved by using spray foam.


