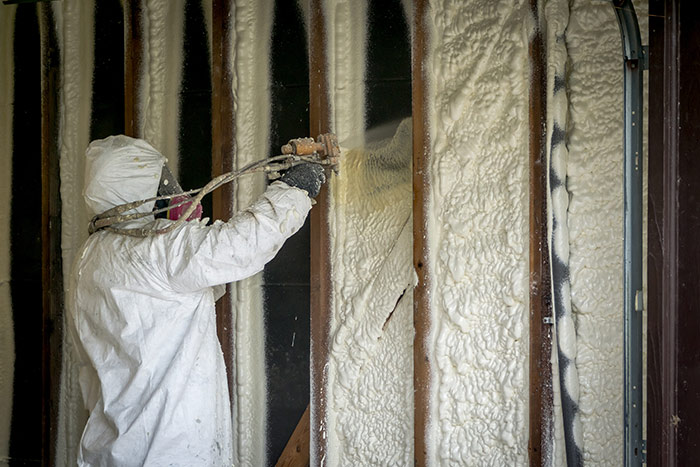
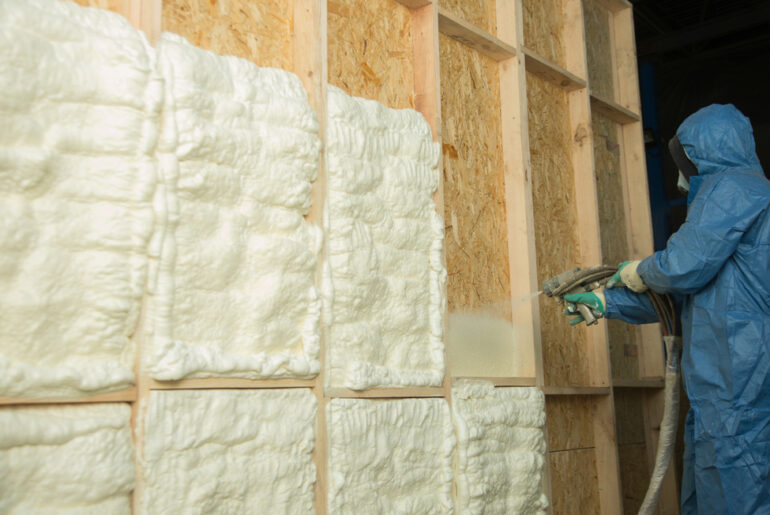
Giving you an R-value of 7 per inch, closed-cell spray foam insulation is one of the most effective and efficient insulation options for your van. It keeps the interior comfortable year-round, prevents moisture and water buildup, seals seams, and helps to block out exterior noise.
The spray foam insulation process typically consists of three steps. First, the existing insulation or structure must be prepped. It can involve removing panels, patching holes, and ensuring the surface is clean of dust and debris. You can do this yourself or hire a professional to do it for you.
Lastly, you spray the foam. This is where you need the extra help—it’s a tricky and messy process with plenty of potential for mistakes. Let’s learn more about this.
Will Spray Foam Insulation Work For Any Van?
Spray foam insulation is commonly used for camper vans since when you need to get a good seal, and it’s usually quite easy to prep the surface.
To save money in the short term, you should look into other forms of insulation, such as fiberglass or mineral wool. Fiberglass insulation is the best option if you’re looking for a budget-friendly option that is easy to install in an RV.
Here are some reasons to use spray foam in your van:
- Prevents Moisture Buildup: Spray foam insulation has a high R-value and is effective at blocking out moisture and preventing it from entering your van. Thus, it helps keep the interior comfortable.
- Reduces Noise: Insulation helps to reduce noise from outside sources and makes it easier to relax without the worry of outside noise.
- Reduces Condensation: If your van is exposed to cold temperatures, it can create condensation on the inside, which can damage the interior. Insulation helps to prevent this and keeps your van looking nice for years to come.
Besides these reasons, the most obvious advantage of insulation is energy efficiency. Spray foam is a viable option for regions with colder climates since it has a high R-value.
The material build of your vehicle frame will also determine whether spray foam insulation will be the best choice for you. For instance, if your van is made out of aluminum, the adhesive used for the insulation will stick, but the chemicals (acids) in the foam will react with the aluminum and cause corrosion. However, there are aluminum safe versions In this case, you’ll have to prime the vehicle before application to prevent the insulation from falling off.
Advantages of Using Spray Foam For Vans
There are many advantages to using spray foam for vans. Here are some of them:
Superior Insulation
Spray foam provides excellent insulation and noise reduction, creating a comfortable environment inside the van. While other insulation materials also provide insulation, they require more space and can be difficult to install. Spray foam conforms to the shape of the van, taking up minimal space while providing superior insulation.
Reduced Weight
Open-cell spray foam is lightweight compared to other van insulation options, such as fiberglass insulation, resulting in improved fuel economy and easier maneuverability.
Increased Durability
Spray foam is highly durable and resists water, mold, and mildew, making it an ideal choice for vans. It also creates an airtight seal, which helps to reduce drafts and keep the interior of the van at a more consistent temperature.
Improved Comfort
Spray foam helps to create a quieter, more comfortable space inside the van. It also provides an extra layer of protection from cold air in winter and hot air in summer, making it more comfortable for passengers.
Added Value
Spray foam adds value to the van, as it increases the vehicle’s resale value and makes it more attractive to potential buyers.
Cost Savings
Since spray foam is a more efficient insulation option, it can help lower energy costs and save money over time. It creates an impermeable vapor barrier that prevents condensation in the van’s metal walls, slowing wear and tear.
Considerations When Using Spray Foam Insulation For Vans
When using spray foam insulation for vans, it is important to consider the potential health risks. Spray foam contains chemicals that emit volatile organic compounds (VOCs), which can be toxic if not properly ventilated.
Therefore, you should not use the van until the spray foam has cured completely and all VOCs have been dissipated. It is also important to use the foam following the manufacturer’s instructions, as improper application can lead to a poor insulation job.
Plus, spray foam is more expensive than other insulation options. Therefore, you must compare different products and prices before purchasing.
How Much Does It Cost?
Spray foaming your van can cost anywhere from $400 to $1,500, depending on the size of your van and the type of spray foam insulation you choose. For example, the cost for 1 square foot of insulation with an R-value of 1 is $0.27.
Since spray foam has an R-7 value, the cost will be higher, up to $1.89. So, if your van needs 100 square feet of insulation, the cost will be between $270 and $1,890.
Given the many advantages of spray foam insulation for vans, this may be a worthwhile investment.
How to Insulate Van Using Spray Foam Insulation [Process & Tips]
You can buy a spray foam kit to DIY your van insulation. Here’s how to insulate your van with spray foam insulation.
Step 1: Measure the Area
Start by measuring the area you want to insulate and cut the pieces of foam accordingly. Make sure that all edges are tightly sealed.
Step 2: Test the Spray Gun
The spray foam mixture comes pre-mixed from the manufacturers. Before you start using it, spray the gun into an empty box to check if the flow is even.
Step 3: Apply Foam
Apply the foam to all areas you want to insulate. Make sure that no gaps are left between the surface and the foam. Keep the spray gun at least 6-10 inches away from the surface as you apply it.
You should replace the tip on the spray gun or clean it with acetone every time you stop spraying for at least a minute to continue again.
Step 4: Clean Up
Once you are done, wipe up any excess foam with a damp cloth with acetone. Using wire brush to scrape away any hardened foam from the surface is not recommended as you will likely remove the paint.
Let the foam cure for 24 hours before you start using the van. Make sure that the area is well-ventilated when the foam is curing.
Tips for Insulating Your Van With Spray Foam
Here are some tips to keep in mind when insulating your van with spray foam insulation:
- Use a respirator and safety glasses to protect yourself from the chemicals in the spray foam and full skin protection.
- Ensure that the surface is clean and dry before you begin applying the foam.
- Avoid getting the foam in contact with electrical wires and outlets.
- Do not use the van unless the foam has completely cured.
- Be mindful of the local regulations for applying spray foam insulation.
It’s preferable to use closed-cell foam for better insulation and soundproofing.
Alternative Insulation Options for Vans
While spray foam is one of the best insulation options for vans, there are other alternatives you can use.
Fiberglass Insulation
Fiberglass insulation is available in batts or rolls that you can cut to size and install. It’s an affordable option but not as effective as spray foam insulation.
Reflective Foil Insulation
Reflective foil insulation is usually sold in rolls or sheets. Reflective foil isn’t technically insulation. The reflective foil reflects radiant heat, but it does not prevent conduction or convection heat transfer like insulation. It provides good heat and sound insulation but can be more expensive than other options.
Compared to spray foam, it requires more intensive installation.


