Installing foam board insulation on an interior ceiling is a great first time do-it-yourself home maintenance project. Installing foam board insulation on an interior ceiling is a great way to hone your DIY skills, while putting a few energy dollars in your pocket.
Any insulation is critical to maintaining low levels of energy consumption, but foam board insulation is particularly well suited for interior ceilings. Foam board insulation is effective, lightweight, and can be attached in a number of ways, depending on your skill level.
Here we will discuss the process of installing foam board insulation in an interior ceiling the way the pros do it. The process can be sped up with power tools, but the entire process can be accomplished with a few simple tools you may already own.
Which Foam Board Insulation Is Good For An Interior Ceiling?
The most commonly used foam boards are made from styrofoam, known as XPS (EXtruded PolyStyrene. XPS is also known as pink board or blue board, making it easily identifiable. Other versions are available as well, including closed cell foam boards and EPS (Expanded PolyStyrene).
Foam board insulation can be installed on the surface of a ceiling and directly connected to the joists or truss chord. Generally, the surface mount method is used sparingly because it requires very long fasteners when installing drywall or other covering.
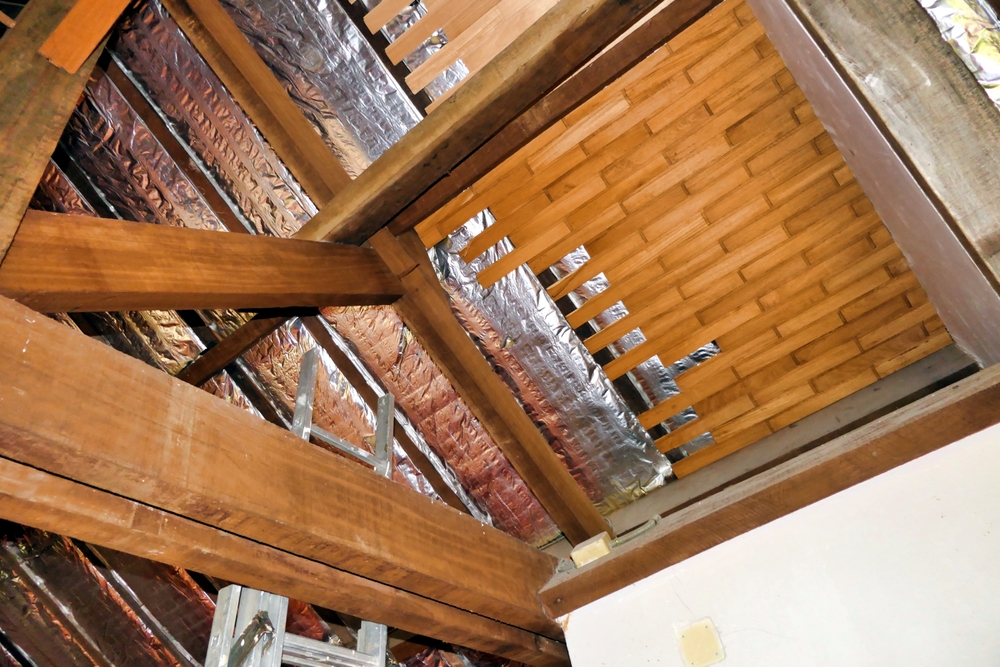
For our purposes today, we will describe the most effective method, which is to install the foam boards inside the ceiling void between the truss chords or ceiling joists.
In most installations, the foam board insulation panels are cut to fit within the cavity between the chords or joists. This method allows the drywall to contact the framing directly, increasing the strength of the fasteners.
How Do I Install Foam Board Insulation In An Interior Ceiling?
As with any insulation project you will first determine how you will reach the ceiling. Most pros use walkboards, stilts, or scaffolding, depending on the ceiling height. Most interior ceilings are 96” to 120” high, so many pros erect a walkboard because it can be quickly disassembled and relocated.
If your ceiling is over 120” high, most professionals will use rolling scaffolding instead of walkboards because they provide a wider walking surface. Scaffolding also produces space for your tools, so you don’t have to hang them from your tool belt.
1. Measure the Ceiling Area
The next step is to take measurements. In this example, let’s say you are insulating a living room 16’ x 20’ with 120” tall ceilings. The same process will work with any room, but we’ll use a large room to illustrate.
Measure the width of the room (16’) and the length (20’) and multiply them to find the product: (16 x 20 = 320 square feet of area). If your foam insulation boards are a common size, like 4’ x 8’, you can calculate that each panel will insulate an area of 32 square feet.
Next, we divide the total area of the ceiling by the number of square feet provided by each foam board: (320/32 = 10 panels).
2. Decide How You Will Attach the Foam Board Insulation
Foam board insulation panels do not typically include a mounting flange to allow surface mounting of the foam board. Most foam panels are attached either mechanically with a button cap nail or staple, or installed using adhesives. Installing foam panels in an interior ceiling can be a challenge if the attic or floor above has not been installed.
If your interior ceiling is open to the attic and the drywall has not been installed, one or the other will often be required before installing the foam boards. There are emergency options, like installing a 6mm plastic sheet across the truss chords to provide a backer, or using expanding spray foam but these techniques are more the exception than the rule.
3. Measure the Voids Between the Truss Chords Or Ceiling Joists
Most joists and trusses are placed on very accurate spacing, usually 24” on center. The dimensions of the void between the lumber is usually 22 ½”, so your foam panels may need to be trimmed to width. Foam boards are easily cut with a razor knife.
Most ceilings will include a component known as dead wood, which is just a block nailed to the top of each wall, placed between the chords. Dead wood is used to provide a mounting surface for the drywall between the chords, so you may need to trim your panels to length as well to allow for the deadwood.
4. Installing the Foam Board Insulation In the Interior Ceiling
The next step is to decide how you will attach your foam boards. Generally, adhesive is preferred for mounting foam boards because the material is so lightweight adhesives have no trouble. Mechanical fasteners risk nicking a pipe or wire, so adhesive is often the preferred choice.
Foam board insulation has the advantage of additional control over the R value, in contrast to fiberglass batts. Foam boards provide anywhere from R-2 to R-7, depending on the foam board. You may opt to either add additional layers of thin foam boards, or even use one thicker, single foam board.
Most professionals use an adhesive like this one to attach foam boards, but many versions of adhesives are available for specific types of foam board. Some foam boards will contain a foil backing used as a vapor barrier, while other foam boards will not.
If your foam board insulation panels do not include a foil vapor barrier, the pros recommended adding a layer of 6mm plastic sheeting between the back of the void and the foam board. The vapor barrier will help keep moisture behind the foam boards instead of allowing them to absorb it.
4. Combining Foam Boards With Expanding Spray Foam Insulation (*Optional Step*)
A more advanced method for attaching foam boards to an interior ceiling involves the use of either closed cell or open cell spray foam insulation. If the structure of the ceiling allows for it, many professionals will use spray foam as an adhesive instead of an adhesive designed for foam boards.
Spray foam (either closed cell or open cell) is extremely sticky, so since the foam boards are lightweight, the foam makes a very effective adhesive between the wooden framing and the foam board.
Using spray foam also allows for the foam boards to be adhered to the chord or ceiling joist, as opposed to a backer. When the foam boards must be installed prior to drywall or attic flooring, the pros spray the expanding foam around the interior perimeter of the void and allow it to begin expanding.
Before the foam hardens, a foam board can be pressed into place, allowing the foam to expand around the board, connecting it permanently to the wooden framing. Using spray foam is a bit more expensive and time consuming, but also might prevent an expensive delay, especially during new construction.
5. Trim the Foam Board Insulation (and Spray Foam) As Needed
Because foam panels are available in standard thicknesses, you can’t always fill the void completely. For example, if your attic has a floor and your trusses or ceiling joists are built from 2” x 4” lumber, the void will be 3 ½ ” deep.
Foam boards are available in ½” thicknesses, so you could use a combination of 1” and ½” panels to achieve the desired 3 ½” thickness. However, if you use the spray foam attachment method, you must allow for the expansion of the foam or the foam boards might be pushed past the framing as the spray foam cures.
Generally, professionals will use closed cell spray foam instead of open cell foam because closed cell foam provides more R value per inch than open cell foam. This method also reduces the chances of the foam pushing the foam boards because it only expands slightly.
If your foam boards and/or spray foam cures beyond the surface of the ceiling, it can be easily trimmed with a long blade, like a serrated carving knife. You can also purchase professional tools like powered trimmers to speed up the process, albeit at a higher cost.
After the foam boards have been trimmed away from the outer edge of the ceiling joists or trusses, the surface is ready for drywall or other covering. Because the foam board is between the joists and not surface mounted, you can use shorter, stronger (1 ¼”-1 ½”) screws or nails to install the covering.


