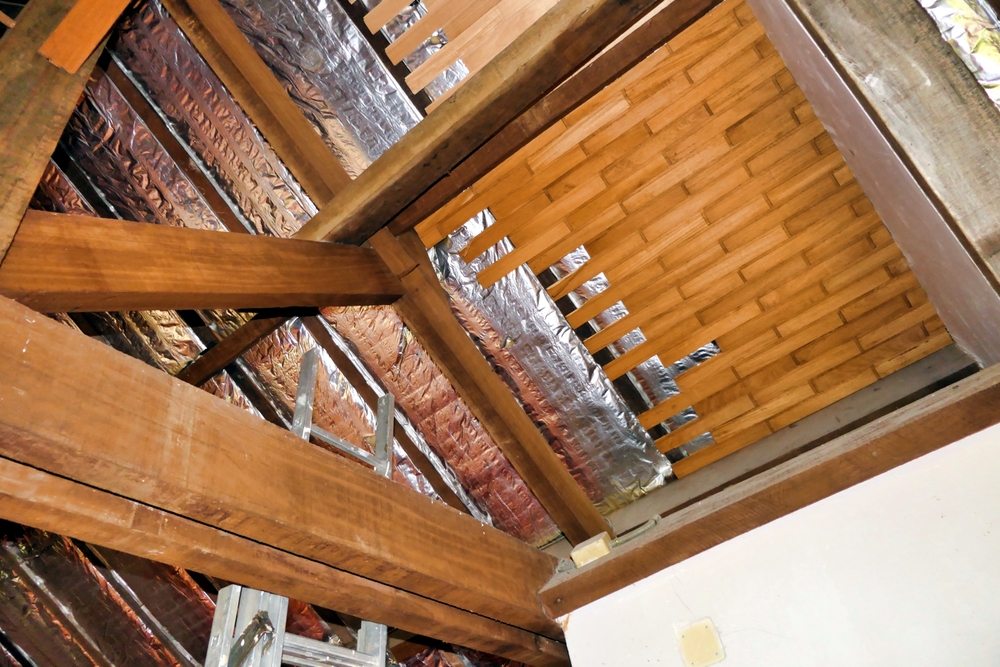
Vaulted ceilings are a bit more work to insulate than a flat ceiling, but the effort is worth it. Vaulted ceilings add flare to living rooms, foyers, and bonus rooms by making the rooms seem bigger than they are.
Because vaulted ceilings rise, so does heated air. Under-insulated vaulted ceilings can cause rooms to feel drafty because much of the heat is over the occupant’s head. In many instances, the heat escapes through the drywall faster than the HVAC system can replace it.
Effectively insulating a vaulted ceiling makes the space more comfortable, while reducing your energy bill. Insulating a vaulted ceiling often requires tools like walkboards and scaffolding to access the surface due to the rising angle.
Here we will describe the process of insulating a vaulted ceiling and what tools you’ll need to do the project effectively and safely.
Are Vaulted Ceilings Hard to Insulate?
Gravity works with you when insulating a flat ceiling with an attic, but works against you when insulating a vaulted ceiling. Flat ceilings with an attic can be insulated with essentially any form of insulation from denim blankets to blown-in cellulose and everything in between.
Technically, vaulted ceilings can be insulated with the same materials, but some methods work better than others. Closed-cell spray foam insulation is the best insulation option overall for vaulted ceilings, but you can also use denim blankets, fiberglass batts, foam panels, and mineral wool.
Can I Use Blown In Insulation In a Vaulted Ceiling?
Generally, you’ll want to avoid using blown-in insulation in a vaulted ceiling for two reasons. The first is that gravity will force the insulation to collect at the bottom, which will make the insulation uneven and lead to cold spots.
The second is that vaulted ceilings are especially dependent on the roof and soffit vents to control moisture. Vaulted ceilings don’t have a large area between the ceiling and the roof, so what space remains must stay clear and unobstructed.
Loose insulation is more likely to become airborne and block a soffit vent than mechanically attached insulation like fiberglass batts or mineral wool. Any roof (including flat roofs) using loose-fill blown-in insulation will require baffles between the rafters to prevent vent blockage.
There are exceptions of course, as some vaulted ceilings create crevices within the framing that are difficult to access and insulate. In these instances, using batts or mineral wool would be impossible, so loose fiberglass, cellulose, or spray foam are used instead.
If you prefer to use loose fiberglass or cellulose for the entire vaulted ceiling, be sure baffles are in place to prevent the insulation from blocking the soffit vents. If the vents become blocked, moisture will collect in the insulation and can lead to water damage, mold, and mildew.
What is the Best Way to Insulate a Vaulted Ceiling?
Most vaulted ceilings are insulated using either closed-cell spray foam or fiberglass batts. Both versions can be installed by a DIYer, but fiberglass batts are less expensive and easier to install than spray foam.
How Do I Use Fiberglass Batts to Insulate a Vaulted Ceiling?
You’ll need a step ladder, lift, or scaffolding to install fiberglass batts into your vaulted ceiling. A manual, electric, or pneumatic staple gun will make attaching the batts much easier. You’ll also need a long-bladed knife and a measuring tape.
Optional tools like a walkboard and ladder jacks will help you avoid constantly moving step ladders. Some vaulted ceilings are too high for even the tallest step ladders, so these projects require either scaffolding or a mechanical scissor lift.
Fiberglass batts release tiny shards of glass when they are handled, so be sure and wear eye, skin, and lung protection when working with fiberglass in any form.
Step 1. Measure the Batts
First, you’ll need to know how wide your batts should be. In most vaulted ceilings, the rafter and joists (or trusses) will be on 24” centers, so you’ll need 24” (actually 22 ½”) wide batts. However, batts are also available in 16” widths to match the rafter spacing on older homes.
Next, measure the area of your vaulted ceiling by multiplying the width times the length. If your vaulted ceiling is 12’ x 20’, you’ll need to insulate 240 square feet of ceiling. Building codes generally require a minimum of R-38 in a ceiling, so 24” wide R38 batts are most common.
Step 2. Selecting the Batts
Batts are often sold in bales, which contain about 60-65 square feet of R-38 insulation. In our example, you will need about four bales, making the cost of the insulation under $500.00.
Step 3. Installing the Batts
Installing the batts is easier if you have a helper on the floor. Professionals avoid putting materials on ladders and scaffolding as they can be a trip hazard. A better alternative is to relay measurements to a helper on the floor.
If you are working alone, you can often pre-cut your batts on the floor. Since the batts are already the correct width, you just need to cut them to length with a long-bladed knife or shears.
Simply staple the batts to the rafters using the tab on each side, or use button cap nails. If you start at the top instead of the bottom, you won’t have to constantly lift the batt over your head.
How to Use Expanding Spray Foam Insulation In a Vaulted Ceiling
The best do-it-yourself spray foam insulation solution is to purchase a kit. Spray foam insulation kits include two tanks, one containing isocyanate and the other polyurethane. Also included in the kit are spare tips, hoses, and other accessories to make the job easier.
You’ll need to do some prep work before using a spray foam kit. Spray foam can cause irritation to your skin, eyes, and lungs, so invest in gloves, skin protection, and a respirator. You’ll also need to ensure there are no tripping hazards or other obstacles in the way.
Step 1. Install Drop Cloths
Spray foam insulation is extremely sticky, so install disposable drop cloths over everything you don’t want insulated. Cover the floor, yourself, and your tools before you begin.
Step 2. Using Heat Blankets
Depending on the ambient temperature, you may need to rent or purchase heat blankets to keep the tanks above 78 degrees. Most pros leave the tanks in the box and wrap them in heat blankets to retain the heat.
Step 3. Cover Electrical Boxes
If your vaulted ceiling has an electrical box for a ceiling fan or light fixture, cover the box completely. Allowing spray foam insulation into the box will not damage the box or the wiring, but it will make installing the fixture difficult.
Step 4. Spraying the Foam
Follow the directions carefully that come with your kit. In most kits, the materials from the tanks mix as they exit the spray nozzle. Your kit may have more or less pressure than others, so practice a little to determine how fast to move the nozzle.
Most pros overfill the space slightly to ensure there are no gaps or cracks. Once the foam has cured, go back with an insulation trimmer to remove the excess. If you underfill a space, you can add more at any time.
If necessary, you can intentionally underfill a space, leaving room for electrical wires. As long as you install enough spray foam to achieve the required R-value, you can leave as much space as needed.
Do I Install Spray Foam In a Vaulted Ceiling From Above or Below?
Most building codes require a minimum of R-38 insulation in a ceiling. To achieve R-38 in a ceiling the foam must be about 5.5” – 7.5” thick.
If your vaulted ceiling is built from trusses, you’ll install the insulation after the drywall is installed, as opposed to fiberglass batts, which are installed before the drywall.
Some vaulted ceilings are built from beams or large lumber, so there are no ceiling joists or collar ties needed for support. If your vaulted ceiling has no attic, you can spray the foam from underneath, just like batts.
Stay at least 2” away from recessed light fixtures, like can lights. If you accidentally cover a recessed fixture, the heat from the bulb cannot escape and will lead to overheating of the fixture.


