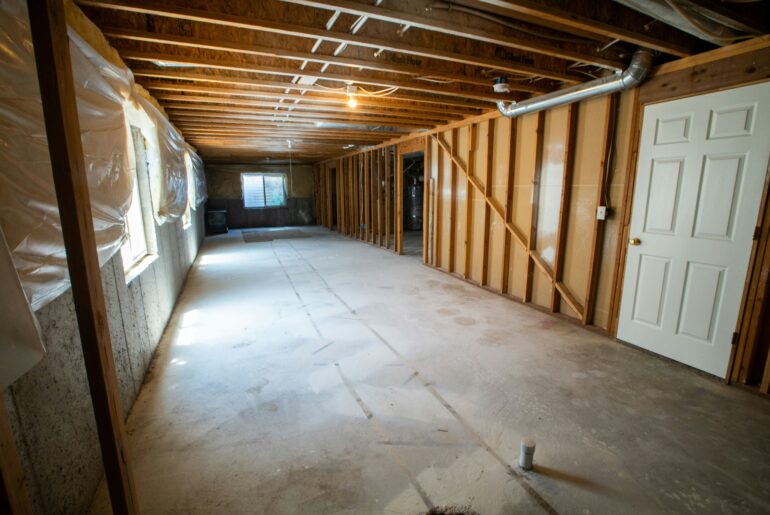
Concrete floors, or pads as they are often called, don’t always get insulated before they are poured. Many concrete pads, like the one in your garage, probably have a plastic vapor barrier under them, but nothing else.
Concrete floors are so common now in residential construction, we thought it would be useful to explain what should, and should not be done before pouring a concrete floor. Forgetting a simple step can lead to expensive problems, like cracking, crazing, and an unsuitable finish.
Here we will discuss the most common methods the pros use to insulate a concrete floor before pouring it. The time and effort you spend in preparation for your new concrete floor will pay off over time in repair savings and increased usefulness.
Why Are Some Concrete Floors Insulated When Others Are Not?
For a long lasting, concrete floor that can be used for something other than a place to store your things, the floor should always be insulated. Most building codes do not require concrete pads to be insulated, but they do require a minimum thickness, and a vapor barrier.
In theory, a thicker concrete floor will be more resistant to heat conduction than a thinner floor, which is why some should be insulated. Concrete is a fairly effective thermal conductor, but just within the first few inches.
A 12” thick concrete floor may feel cold on the outside, but most of the internal concrete remains a constant temperature. The increased thickness also helps the concrete floor chip instead of crack when forces are applied, making repairs much easier.
Residential concrete floors, however, are commonly poured to minimize the concrete used. Since most building codes only require a vapor barrier and 3”- 4” of concrete, that’s what most homes have. Residential concrete floors are too thin to effectively resist heat transfer so they should be insulated.
What Insulation Do I Use to Insulate a Concrete Floor Before Pouring?
With rare exceptions, concrete floors should be insulated with rigid foam panels designed for concrete. No other insulation material, like fiberglass, cellulose, or mineral wool can withstand the immense weight of the floor without collapsing.
Rigid concrete insulation panels are available in a wide range of sizes and configurations, depending on the goal. Hydronic heat systems, for example, are a common upgrade when pouring a concrete pad. You can also purchase rigid foam panels designed for a specific task, like channeling water towards a floor drain. In most cases, tapered rigid foam panels are interconnected and include a built in slope angle of your choosing.
What Do I Do If An Old Concrete Floor Or Subfloor Is In the Way Of a New Concrete Floor?
If you are pouring a concrete floor where an old concrete floor remains, you can install rigid foam panels between the old pad and the new one. However, never pour a new concrete floor over old wood framing, like a subfloor.
It seems hard to believe, but concrete continues to harden for many years after it is first poured. Very old concrete is extremely difficult to remove because it has hardened over many decades. As a result, as long as the old concrete is stable, you can use it as a substrate for the new floor.
Wood however, trapped under concrete, will rot. When the wood rots, it decays and falls apart. If the wood is supporting your concrete floor, it will take the floor with it as it disintegrates. You can still use the old subfloor for other flooring materials, just not a concrete floor.
How Do You Insulate a Concrete Floor Before Pouring?
1. Measuring the Area
Obviously, you will need to know how much rigid foam insulation to buy. In case anyone needs a refresher, just multiply the width by the length for a square area measurement. Knowing how much to purchase and how much waste to account for is important.
You won’t have much waste if you put some time into the math. For example, if you plan to use the concrete floor as a shop floor, chances are good you are also planning at least one floor drain. You might also be planning expansion joints in certain areas, so you’ll want to plan them out.
If you will be using standard sized rigid foam panels, you can use the same formula to decipher how many you need. Here’s an example:
Total Concrete Floor Area to Be Insulated = 20’ x 15’ Concrete Floor = 300 square feet
Total Area Of One Panel = 4’ x 8’ = 24 square feet
300/24 = 12.5 Rigid Foam Insulation Panels
If you carefully plan the layout, you will probably still have some waste, but not more than 10% or so.
2. Level the Substrate As Much As Possible
The more even and consistent your substrate is, the more accurately you can calculate how much concrete you will need. You will always need to add a little extra concrete to replace the water that is absorbed by the substrate or evaporation. Most suppliers will let you purchase concrete in increments of a half yard, so always order a half yard extra.
If you used a gravel type substrate like crushed gravel, a rake is useful for leveling out the surface. Compacted sand makes a great substrate too, but it is usually smoothed with a large tool called a bull float and used for concrete leveling.
Preventing dips and humps in the substrate is critical to the performance of the rigid foam. The rigid foam insulation panels can withstand the weight of the concrete, but only if they themselves are properly supported.
A dip more than a half inch deep or so may not be able to support the very heavy concrete and cause a crack in the panel. A crack might allow groundwater, insects, or even plants to emerge from the concrete over time.
Even if you have to dispose of the extra concrete, you don’t want to run out in the middle of a pour. If you run out and have to order more concrete, the older concrete will already be hardening before the new concrete is poured. The result is a cold joint and should be avoided.
3. Install the Rigid Foam Insulation
Installing the rigid foam insulation is the fun part because it installs quickly, so progress is almost instant. If you opt for smaller foams panels, the job will be a little slower, but still be effective. Ideally, you’ll want to use the largest rigid foam insulation possible, because it will eliminate the most seams. If the insulation leaks it will likely be at a seam, so they should be minimized.
For the most water resistant installation, use interlocking rigid foam panels, or tongue and groove. If you are installing tapered panels towards a floor drain, it is often advantageous to install the panels closest to the drain first, as they will likely require the most modification.
For standard rigid foam insulation, just cut the first panel (regardless of size) in half. Install the first panel, making sure to follow any guide marks you have made to keep the panels straight. The second panel is installed full size and the pattern continues until the opposing wall is reached.
Trim the last panel in the row to fit and begin the next row with a full sheet. It doesn’t matter if you go the other way or repeat the same direction. Follow the pattern until you reach the opposing wall and repeat until the floor is insulated.
4. Seal the Seams
Once the panels are in place, go back and seal every seam with the appropriate tape for your panels. In case you’re wondering why you don’t just tape the panels as you go, it’s to potentially save you work.
You may get halfway through the project and realize you need more grade work to prevent a dip under the panels. You then might have to adjust preceding panels because you added more underlayment to correct the dip. Leaving the seams untaped until the end ensures you won’t have to undo work to make an adjustment.
5. Check For Level
After you’ve sealed the edges, installed hydronic heating, or performed any other upgrades, you’re ready to set your guide pins, expansion joints, and add rebar. Expect a few noises as the panels rub together and find their resting spot under the weight of the concrete.

