Thinking of using spray foam to insulate your garage walls but not sure if it is the right material?
Spray foam is a high-end type of insulation that is commonly used in walls, including garage walls. Although costly, it provides remarkable thermal performance while also serving as an air barrier to prevent condensation.
This article covers everything you need to know about spray foam on garage walls and why it is worth installing.
Advantages of Using Spray Foam in Garage Walls
Spray foam is a type of insulation specifically developed to fill and seal gaps or cavities that allow for heat to transfer or escape. It is commonly used to insulate ceilings, floors, and walls—including garage walls.
Due to remarkable R-Value and air-sealing properties, spray foam insulation is a great moisture and heat barrier solution for garage walls. Some may find spray foam an overkill since it is expensive, high-end, meticulous to install in garage walls.
However, if your garage is attached to or beside the, say, living room, then adding spray foam insulation on your garage walls would further help regulate the temperature in your living room. It would be worth installing too if you have plans to convert it into a living space in the future since it both has excellent thermal performance and air-sealing properties.
High R-Value
Spray foam insulation is known to have great thermal performance with a high R-Value of 3.6 to 3.9 per inch. Such a characteristic is essential specifically if your garage is connected to a living space like the living room or the bedroom.
Prevents Condensation
Spray polyurethane foam acts as an air barrier that prevents condensation within walls and potential leaks. If your garage is too humid, excessive moisture can cause rust, mold, and pest issues.
Prevents Mold and Mildew Buildup
Spray foam does not easily absorb and retain water and moisture, which makes it a perfect barrier in preventing mold and mildew buildup within the assembly that it is installed.
Durable and Low Maintenance
Spray foam insulation is made using durable materials that can last for several years. And because it is water- and moisture-resistant, it is not susceptible to common damages that other insulation materials are vulnerable to like mold and mildew buildup.
Disadvantages of Using Spray Foam In Garage Walls
Requires a Experineced Installer
The installation of spray foam insulation is a meticulous, demanding, and time-consuming process. However, an experienced installer can do the job properly. Otherwise, you may have to deal with problems caused by poor installation later on, which could cost you more in the long run.
Health Risk
Based on several studies, spray polyurethane foam was found to have chemicals that spread into airspace and can degrade the quality of air within the space. These chemicals are potentially dangerous to anyone particularly those with high exposure. It is why installers are required to use protective gear.
Such a risk is particularly common on exposed insulation as well. Make sure you cover your insulation properly to avoid the pitfalls of exposed insulation.
How to Add Spray Foam to Garage Walls
There are several different ways to add spray polyurethane foam to walls, and it often depends on the type of wall the insulation material will be installed. However, there is one rule that both professional installers and homeowners agree to follow. And that is to avoid do-it-yourself spray foam insulation.
In this section, you will learn the basic process of adding spray foam insulation to walls the professional way as well as the reasons why it is wise to hire a skilled installer than to do the job yourself.
Step 1: Read Manufacturer’s Guide
The process of installing spray foam insulation differs depending on the type of spray foam you picked. Make sure to follow manufacturer’s instructions for your particular brand to achieve best resuls.
If you decided to hire a professional insulation company, pick a team whose ethics concerning customer service ethics, safety, and commitment to quality work match yours.
Step 2: Choose the Right Product
There are two types of spray polyurethane foam that are available today: closed-cell and open-cell spray foam. And while both serve the same purpose, each type provides varying functions and benefits.
Open-cell, for example, is flexible and lightweight, unlike closed-cell which is dense and rigid. Open-cell has a higher expansion rate too, making it excellent for walls and areas that are hard to reach like nooks and crevices.
Step 3: Prepare the Area and Work Gear
Professional installers do all preparation the same way. And it includes proper ventilation and protective equipment.
It may also require the removal of old and existing insulation—if there is. The area must be cleaned and safe too. You may also need to cover electrical outlets and wires to avoid getting them covered with spray foam.
Step 4: Spray the Foam On-ratio
Once done, installers will now start combining and heating the pre-mixed spray foam solution. This specific step is crucial and must be completed by a professional spray foam installer only. It is to make sure that the solution is mixed properly based on its correct ratio since an unbalanced mixture may impede chemical reactions and taint the quality of indoor air.
Step 5: Spray the Foam at the Right Temperature
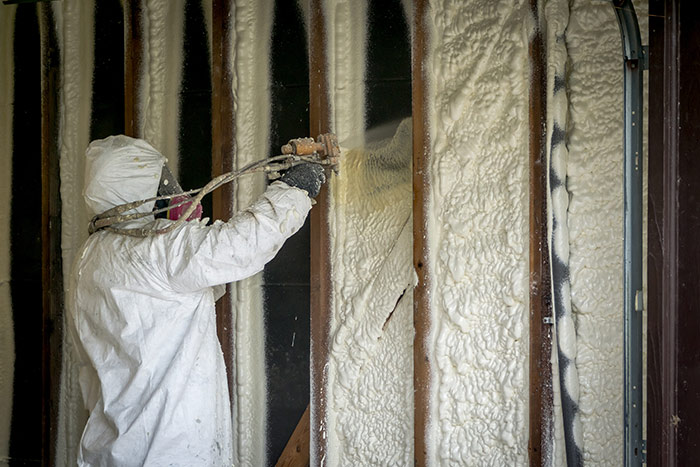
After mixing it, it is time to spray or add insulation to the garage walls. To properly and effectively do it, it must be sprayed at the right temperature indicated on the insulation’s label. Temperature can affect the solution’s effectiveness and may result in degradation. Another reason why it is best to hire a professional installer is.
Step 6: Perform a Quality Test
Finally, after a day of curing, the installer will check and assess the quality of the installed insulation using an infrared camera and blower door. It is to ensure that there are no gaps or cavities left open.
Can You Add Spray Foam Insulation to Existing Insulation in the Garage Walls?
Spray foam insulation—whether it is basement, attic, or garage walls—must not be added over existing insulation, specifically fiberglass.
Here is why:
- It degrades both (new and existing) insulation’s thermal performance
- Spray foam does not stick well on fiberglass insulation
- It reduces spray foam’s ability to resist moisture
- Mold and mildew may develop over time due to condensation
Cheaper Alternatives For Insulating Garage Walls
As mentioned, spray foam insulation on garage walls could be an overkill. If you do not have the budget to install a high-end insulation material, then there are different cheap alternatives that you can use.
Here are a few:
- Fiberglass. It is the cheapest, most accessible, and easiest to install insulation material among others. It is the most used material to insulate walls, floors, ceilings, and attics as a result.
Note: This would not apply to garages with masonry walls. Fiberglass batts have to attach to something with the vapor barrier facing inward. You can’t just turn it around and glue the vapor barrier to the masonry because that would position the barrier backward. - Bubble wrap. By design, bubble wrap helps regulate indoor temperature. Its pockets of air prevent heat and cold from moving in and out of your home.
- Rigid foam. It is a budget-friendly insulation material that suits perfectly for thin walls such as garage walls.
- Radiant barrier and reflective insulation. Reflective and radiant barrier insulation is a type of heat protection system designed to cool down a space by blocking and reducing the sun’s radiant energy.


